
How to Collect Saliva DNA Samples Correctly?
A saliva DNA test begins long before the tube reaches a laboratory. Clean, consistent saliva DNA collection helps protect sample quality and supports dependable laboratory analysis. The process looks simple, but simple does not mean foolproof. Food, drinks, smoking, gum, or toothpaste can introduce problems before collection. Follow the kit’s instructions carefully. They may differ between laboratories and testing purposes.
In practical home collection, timing matters. Wash your hands, rinse your mouth with water, and wait for the specified period. Do not scrape your cheeks or touch the inside of the tube. Let saliva gather naturally, even if the process feels slower than expected. A clear tube, correct fill line, and secure cap are small but important details. One point is easy to overlook: bubbles may make the tube appear fuller than it is. Pause and check.
Before sending the sample, confirm the label matches the registration details. Use the provided packaging, and follow the laboratory’s storage and shipping guidance. Heat, delays, or leakage can reduce confidence in the result. If the sample looks contaminated or insufficient, contact the testing provider rather than guessing. Professional laboratories use documented handling procedures, but collection quality still begins with the person holding the tube. That responsibility is easy to underestimate. Careful preparation improves consistency, not certainty. DNA findings also require appropriate interpretation, especially when results affect health, family relationships, or personal decisions. Small mistakes happen. Reviewing them honestly helps make future saliva DNA collection clearer and more trustworthy.
Preparing the Collection Area and Required Materials
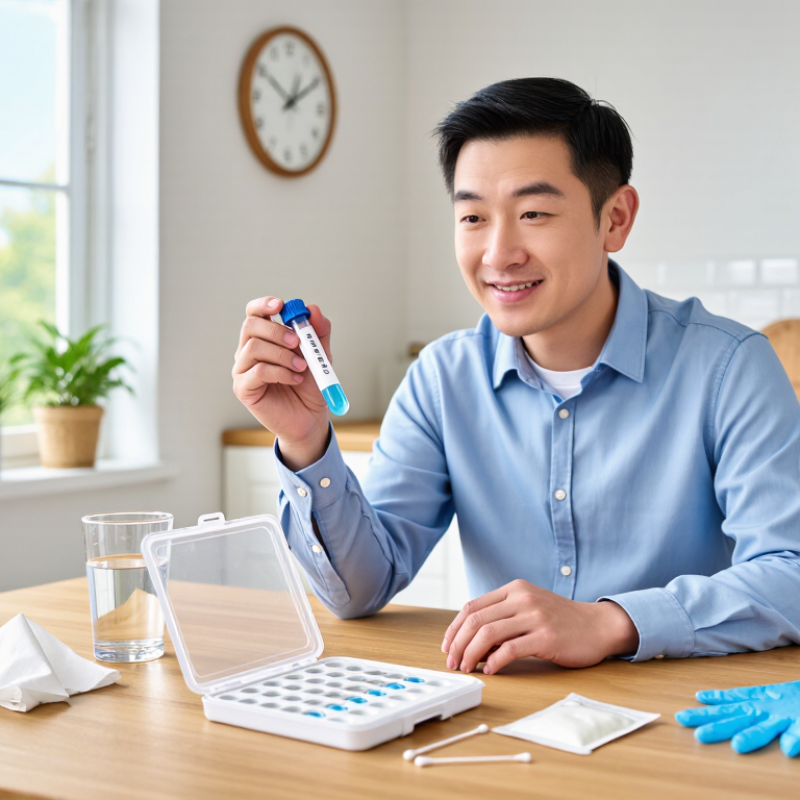
Preparing the collection area is the quiet control point in saliva DNA sampling. Use a clean, well-lit surface with no food, drinks, cosmetics, or loose paper nearby. Disinfect it before setup, then let it dry fully. The World Health Organization’s Laboratory Biosafety Manual, 4th edition, stresses risk assessment, surface decontamination, and controlled specimen handling. These steps reduce avoidable contamination.
Prepare the collection tube, sterile funnel, disposable gloves, absorbent material, labels, a timer, and a leak-resistant secondary bag. Confirm the participant’s identification before collecting anything. Most protocols require no food, drink, smoking, or toothbrushing for about 30 minutes before sampling. A 2022 review in Diagnostics reported that saliva DNA yields vary substantially between methods, commonly ranging from approximately 10 to 100 ng/µL. Collection conditions matter. Small mistakes can change the result.
Keep the tube upright and close to the participant’s mouth. Avoid touching the funnel or tube opening. Label the specimen immediately with a unique code, collection date, and time. Do not rely on memory. I still recheck labels because a clean sample with incorrect identification is practically unusable. The International Society for Biological and Environmental Repositories’ 2023 best-practice guidance also recommends documented handling, temperature control, and traceable storage. Follow the kit’s validated storage instructions, rather than improvising when transport is delayed.
| Step | Area or Material | Purpose | Preparation Requirements | Before Collection |
|---|---|---|---|---|
| 1 | Clean, stable collection surface | Provides a controlled area for opening the kit, handling the tube, and completing the sample. | Use a dry, uncluttered surface away from food, drinks, cosmetics, dust, and unnecessary equipment. | Wipe the surface with an appropriate household disinfectant and allow it to dry completely. |
| 2 | Collection tube with cap | Holds the saliva specimen for transport or laboratory processing. | Use the sterile tube supplied with the collection kit. Check that it is intact, correctly labeled, and within its stated expiration date. | Keep the tube closed until it is time to provide the sample. Do not touch the inside of the tube or cap. |
| 3 | Collection funnel or mouthpiece | Directs saliva into the tube and helps reduce spills. | Use only the component intended for the specific collection tube. Keep the contact surfaces clean and untouched. | Attach it securely according to the kit instructions without forcing the connection. |
| 4 | Disposable gloves | Reduce the transfer of contaminants during handling and packaging. | Use clean, disposable gloves when required by the collection protocol. Gloves do not replace hand hygiene. | Wash and dry hands before putting on gloves. Replace gloves if they become visibly contaminated or torn. |
| 5 | Hand-washing supplies | Help minimize contamination of the collection materials and sample exterior. | Have soap, clean running water, and a clean towel available. Alcohol-based hand sanitizer may be used when handwashing is not immediately available. | Wash hands before opening the kit and after completing the collection. |
| 6 | Participant preparation | Helps obtain an adequate saliva volume and limits avoidable sample contamination. | Follow the collection kit’s instructions. Unless the protocol states otherwise, avoid eating, drinking, smoking, vaping, brushing teeth, or chewing gum for the specified pre-collection period. | Confirm the required waiting period before collection; instructions can vary by test and laboratory. |
| 7 | Sample identification label | Links the specimen to the correct participant and collection record. | Prepare the required label or identification form before collecting the sample. Use the participant ID, collection date, and collection time when required. | Verify the information against the collection record before applying the label. |
| 8 | Collection instructions and timer | Supports consistent collection and helps meet the required saliva volume or timing. | Keep the written instructions available. Use a timer or clock if the protocol specifies a collection duration or a waiting period. | Read the instructions fully before beginning and confirm the target fill line if one is provided. |
| 9 | Stabilizing solution or preservative | Helps preserve DNA during the specified period before laboratory processing. | Use the solution supplied with the kit only when the protocol requires it. Do not substitute another liquid. | Check that the solution is present, sealed, and not leaking. Add it only as directed. |
| 10 | Leak-resistant specimen bag | Provides secondary containment during storage and transport. | Place the securely closed tube in the designated leak-resistant bag, together with absorbent material if supplied or required. | Confirm that the tube is tightly capped and the bag is properly sealed before packaging. |
| 11 | Waste container | Allows used gloves, wipes, and disposable collection components to be discarded safely. | Prepare a lined household waste bin or other container specified by the collection protocol. Do not reuse disposable components. | Keep the waste container within reach but away from the clean materials and unopened components. |
| 12 | Final package and storage location | Protects the completed sample until it is delivered or collected. | Use the packaging and storage conditions specified by the kit or laboratory. Keep the sample away from direct sunlight, excessive heat, and freezing unless instructed otherwise. | Confirm the label, paperwork, cap, secondary bag, and shipping or handover requirements before dispatch. |
Related Posts
-

China Best Forensic DNA Analysis Services for Global Buyers?
-
China Top Life Science Research Tools Suppliers?
-

How to Collect DNA Samples Safely and Effectively?
-
Top 10 Methods for Biological Sample Preservation in China?
-
2026 Top Molecular Diagnostics Technology Trends for Buyers?
-
How to Collect DNA Samples Effectively in 2026?